Hackers love WordPress.
They don’t want to break it.
They want to exploit the vulnerability within your WordPress website.
So that they can install malicious code and script into the system and start stealing your (or your user’s) sensitive data like passwords and credit card details.
Unfortunately, it is not enough to rely on WordPress code alone.
As a WordPress user, you have one responsibility: take precautions.
A handful of simple steps can go a long way in preventing the worst from happening.
In this lesson, we’re going to go over the 12-step checklist that you can take to protect your WordPress site from hackers.
Table of Contents
- Step #1 – Don’t use ‘admin’ as your username
- Step #2 – Use Strong Password
- Step #3 – Install Wordfence
- Step #4 – How to Activate Web Application Firewall (WAF) on WordPress With WordFence
- Step #5 – Use Two-Factor Authentication
- Step #6 – Limit Login Attempt & Forgot Password Request
- Step #7 – Prevent user enumeration
- Step #8 – Schedule Weekly Malware Scan
- Step #9 – Disable PHP file execution in wp-content/uploads directory
- Step #10 – Disable File Editing
- Step #11 – Change the default WordPress database prefix.
- Step #12 – Whitelist IP
- Conclusion
Step #1 – Don’t use ‘admin’ as your username
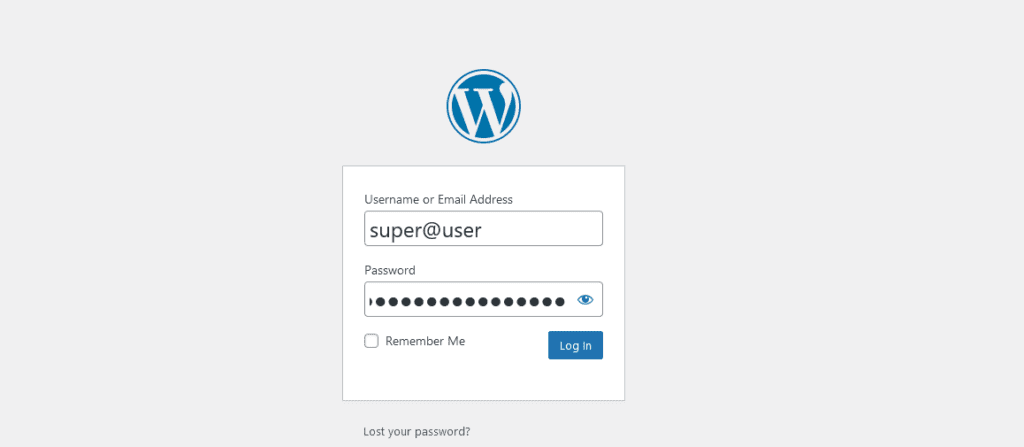
One skill in every hacker’s arsenal is the ability to guess usernames and passwords.
That’s why it’s essential to make sure you aren’t using a weak username/password combination like ‘admin:admin’ or ‘admin:password.’
Once an attacker knows the username with administrative access, all that’s left to do is launch a brute-force attack on your WordPress website.
There are ways to prevent brute-forcing, which we’ll discuss later in this lesson, but it’s way safer to NOT use a generic username like ‘admin’ or ‘owner.’
Your admin username should remain hidden from public eyes and only be used for managing WordPress in the backend.
Therefore, you should create a dedicated account for publishing content only (Author-role user account) and keep your admin username hidden.
Expert Tip: adding the @ symbol in your username will help avoid the real username from getting scooped in the Author page or Rest API.
Step #2 – Use Strong Password
The fastest and easiest way for a hacker to access your WordPress website is through your password.
It doesn’t matter how many security measures you’ve implemented.
Once they have your password, it’s game over (unless you have two-step authentication turned on).

The rules for creating a good password remain the same, don’t use descriptive passwords related to your website’s name or anything easily guessed.
A good password should be completely random and be a combination of letters (lower and upper cases), numbers, and symbols.
If it’s not hard to remember, it’s not secure.
Apart from using a secure and robust password, It’s essential not to share passwords between different websites. That is, using your WordPress website’s password on other websites during registration.
Hackers can easily target you and use phishing to steal your shared password and access your WordPress website.
Apart from phishing, there are marketplaces on the dark web that sell passwords from websites that have been data breached.
All a hacker needs an email address to find out if you have breached data somewhere and purchase that information from the dark web, hoping that you are still using the same password or something similar.
That’s why it’s essential not to share passwords between websites and use completely random passwords each time.
Step #3 – Install Wordfence
One of the best and easiest ways to keep hackers out is installing Wordfence security plugin.
Armed with this powerful technology, your WordPress site will be protected via various ways: server protection, web application firewall, brute force login protection, and many others.
In short – it is the ultimate WordPress security suite available on the market today.
To install Wordfence into your WordPress site, go to your Admin Dashboard > Plugins > Add New, search for “Wordfence,” and install it.
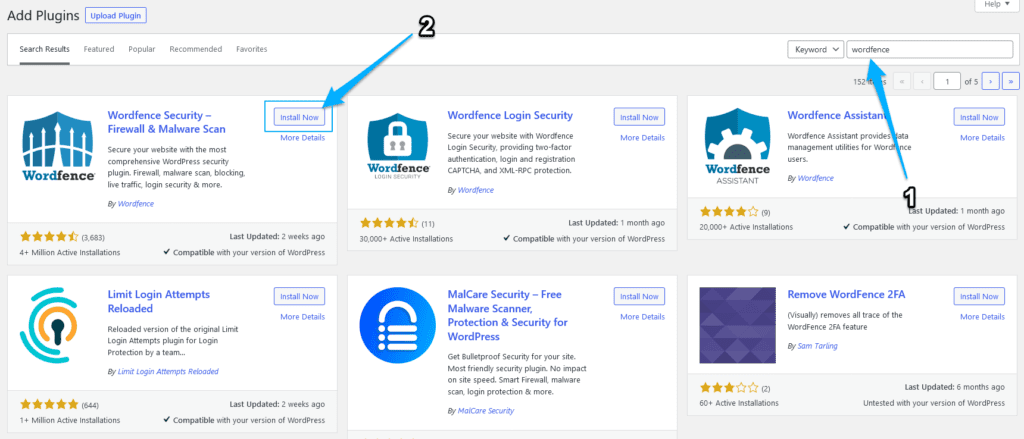
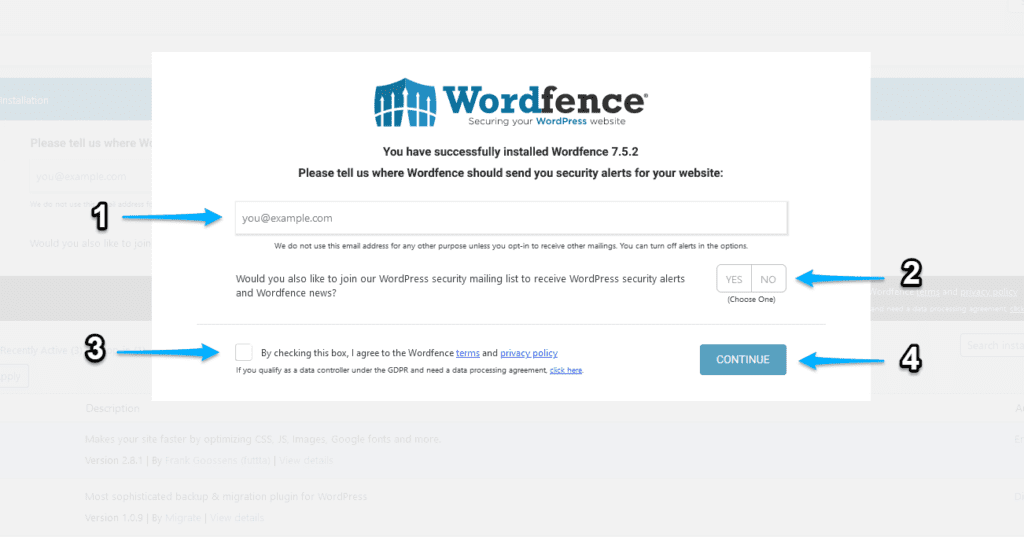
Once you install and activate WordFence, it should automatically bring you to the setup wizard.
Fill out the form, and click Continue.
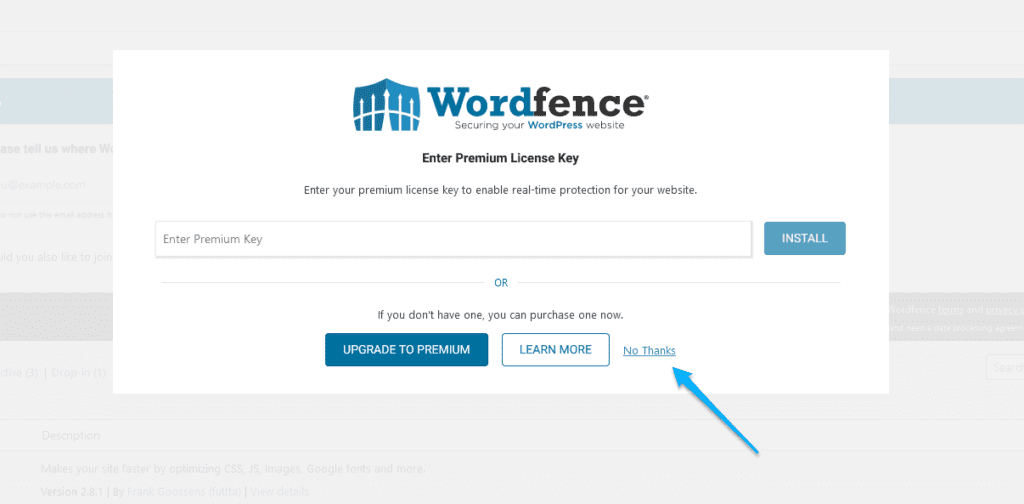
Next, if you have the premium license key, you can enter it here. If you don’t, click the , No Thanks link to continue.
Once you’re done, go to the Wordfence settings page:

You should see two message box on the top of the page:
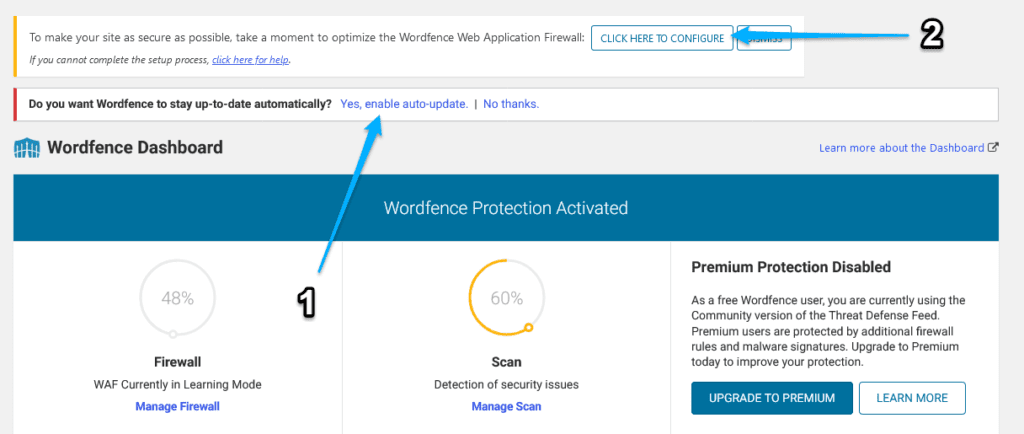
First, click on the Yes, enable auto-update. to enable auto-update for Wordfence.
Then, click on the CLICK HERE TO CONFIGURE button to activate a Web Application Firewall (WAF) for your WordPress site.
Step #4 – How to Activate Web Application Firewall (WAF) on WordPress With WordFence
The first step in setting up WAF is choosing your web server’s configuration.
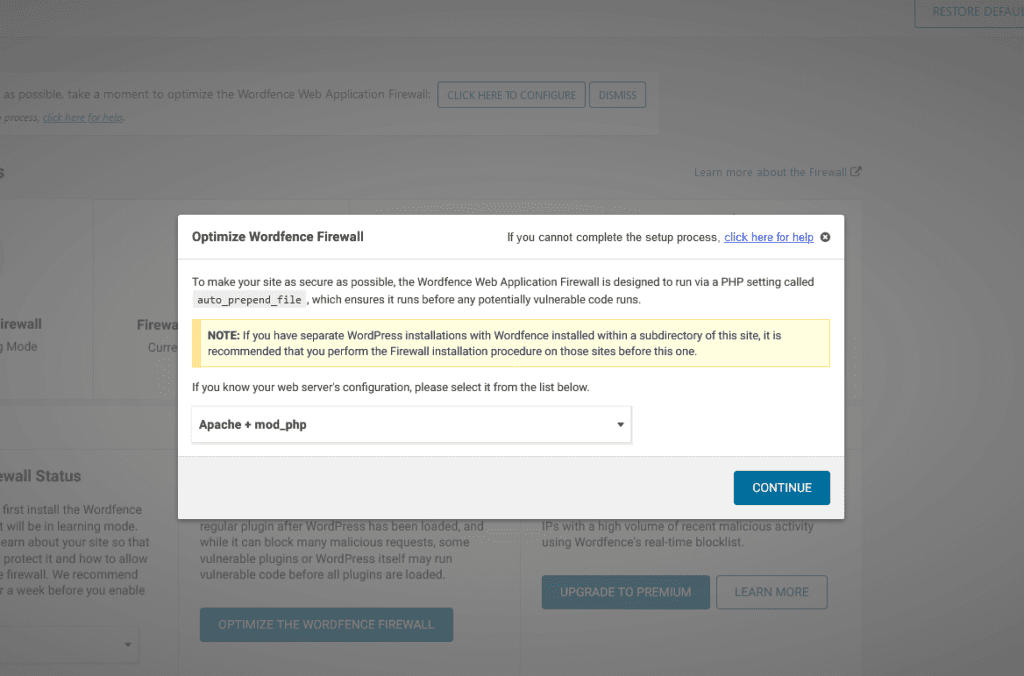
In most cases, Wordfence will automatically identify which configuration you need. If it doesn’t, you should select the correct one from the list.
If you are unsure, click on Continue.
Once installation is completed, you should see the following message.
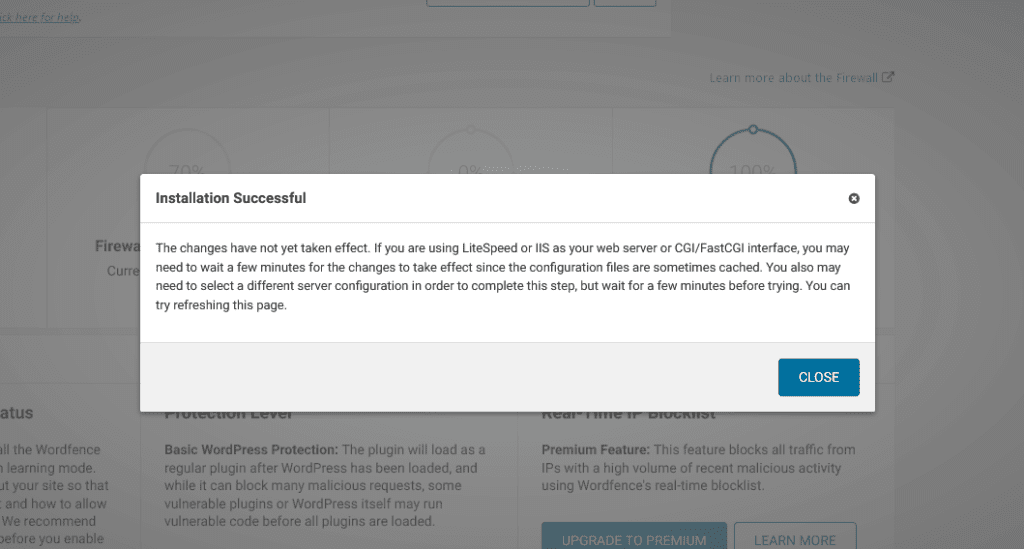
Click Close, and the Web Application Firewall should be activated on your WordPress website.
What are the benefits of having a Web Application Firewall (WAF) for your WordPress site?
The benefit of having a Web Application Firewall (WAF) on your WordPress site is that it will protect you from traditional threats like hackers and other potential web security threats.
These additional benefits include: shielding your user accounts against attacks, better data protection for your WordPress site, and blocking bots to prevent spam attacks.
A Web Application Firewall is designed to detect and block any form of malicious scripts or code before being executed on the website.
They do this through various mechanisms, including:
- Detecting and blocking malicious requests before they hit the server
- Blocking all types of malicious file uploads (malware, web shells, etc.)
- Limiting requests to WordPress Core files and folders
Prevent brute force login attempts by restricting the IP address range to access your site. - Protecting your WordPress site backend database
- Filtering file uploads and user account information.
It’s an invaluable tool and a must-have for any WordPress site.
Step #5 – Use Two-Factor Authentication
Using two-factor authentication will significantly improve your login security and add an extra layer of complexity to hacking your WordPress website.
WordPress websites with Two-factor authentication are hardly hacked via brute force attack.
In fact, it’s almost impossible, except the hacker finds a way to access the device or method you use as an authenticator, like Email or phone.
Implementing Two-factor authentication on WordPress is relatively easy.
Here’s a simple guide on how to do so with Wordfence:
- Go to Wordfence > Login Security:

- Scan the Barcode provided on the page and entered the generated code from the Authentication App (i.e., Authy) into the input bar located at the screen’s right.
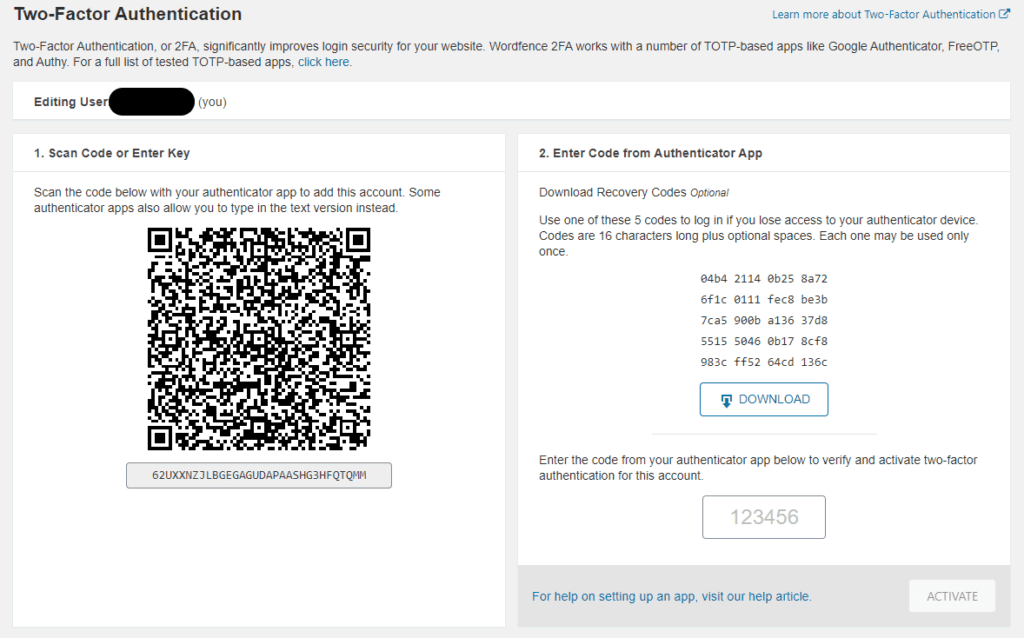
Once that’s done, it’s crucial to download the recovery codes before clicking activate.
Once you click activate, two-factor authentication will be activated on your WordPress website. Every time you log in, you will be required to enter the code from your authenticator app.
Step #6 – Limit Login Attempt & Forgot Password Request
Limiting login attempts and password resets will protect your WordPress site from brute-force attacks.
A brute-force attack is an attack in which hackers try to log in to a WordPress website by systematically checking every possible username and password combination until they find the right one.
These kinds of attacks usually use scripts, tools, and bots to try thousands of logins per minute.
If you have not limited the login attempts and password reset requests, it won’t take long for hackers to find a way into your WordPress site.
Fortunately, limiting login attempts can block these malicious login attempts and won’t allow anyone to try thousands of passwords per minute.
To limit the login attempts and password reset requests, follow these steps:
- Go to Wordfence > All Options, and select Brute Force Protection
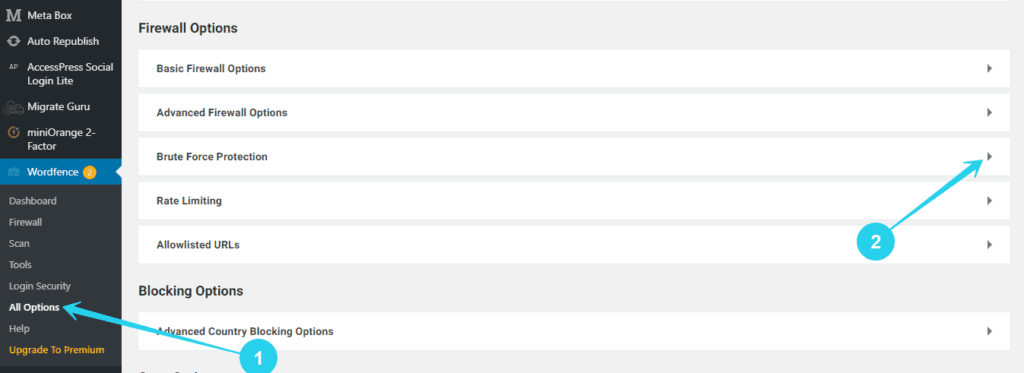
- Make sure Enable Brute Force Protection is ON, then proceed to add limits to both login attempts and forgot password attempts.
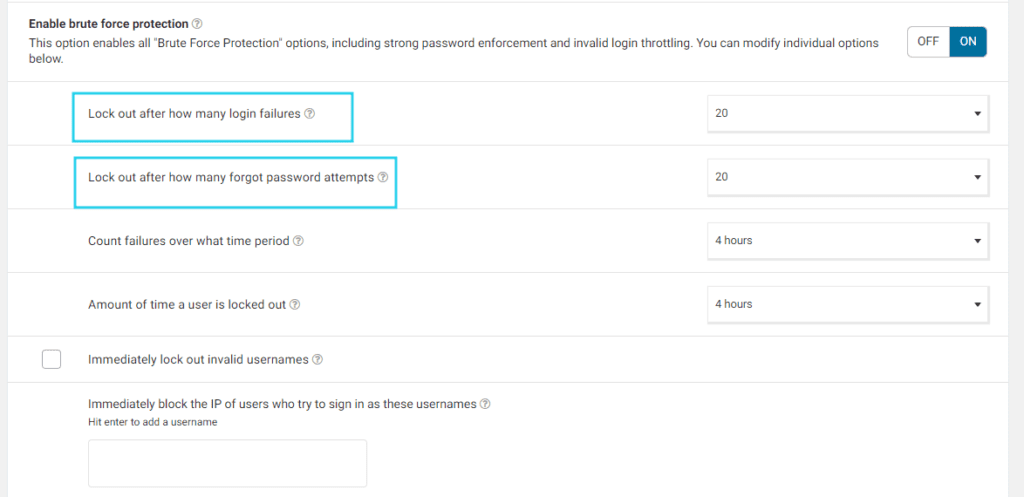
- Once you’re done with the configuration, click on the Save Changes button at the page’s top right to activate all settings.

While there are other things you can change to improve login security, this should be enough to stop most brute-force attacks.
Step #7 – Prevent user enumeration
When hackers have no idea what’s your real admin username is, they might try using a barrage of commonly used usernames in an attempt to uncover the real one.
This is called user enumeration and it’s a form of brute-forcing usernames.
To stay protected, you’ll need to Immediately lock out invalid usernames once they are tried and block the hacker or whoever is trying to guess his way into your website.
Here’s a quick tutorial on how you can implement this on any WordPress site using Wordfence:
- Go to Wordfence > All Options.
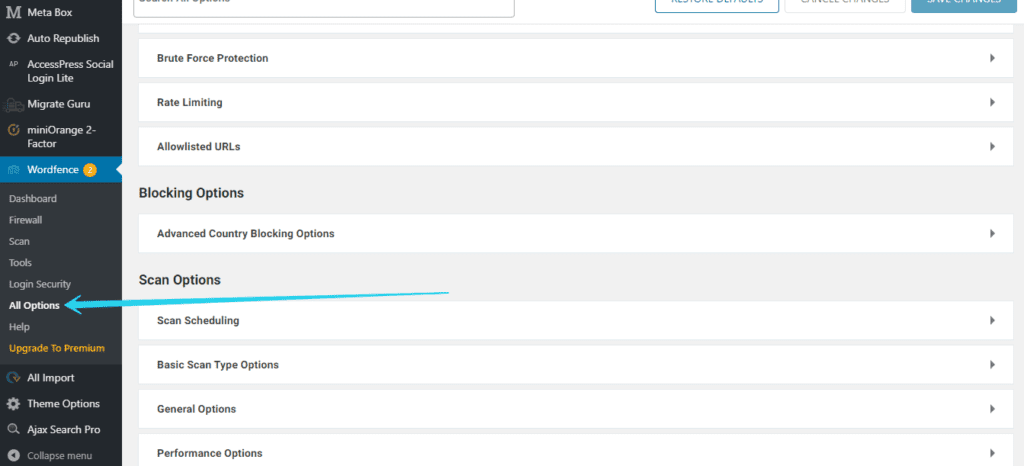
- Just scroll down till you find the Lockout Invalid Username option and check the option to enable it.

You can also provide a list of standard usernames that hackers are likely to try to trap them into the IP blacklist.
- Once you’re done with the configuration, click on the Save Changes button at the page’s top right to activate all settings.

Step #8 – Schedule Weekly Malware Scan
When you add new files (images, pdf, plugins, etc.) into your WordPress site, there’s always a possibility of malicious code hidden in them.
These malicious codes or malware may not run immediately and remain dormant until triggered.
For example, a plugin uploaded into your site may contain malware, but it’s not active until a user with administration privilege login to the site. Once that happens, then that malware becomes active.
The best way to keep your WordPress site malware-free is by running a weekly scan of your server and checking all newly added files.
Here is a simple step on how to schedule a weekly scan and get notifications of any infections:
Go to Wordfence > All Options, scroll down till you find the Scan Scheduling section. Make sure it’s set to ENABLED.

For Free WordFence users, a full malware scan is performed every 72 hours, that’s twice a week.
You can specify when you want scans to be performed for premium users but overall, enabling this feature should keep you safe from malware.
Step #9 – Disable PHP file execution in wp-content/uploads directory
By default, PHP files have the permission to execute whatever code they contain.
Hackers can exploit this feature to run malicious code on your WordPress website.
If you’re using a Web application firewall that filters all executions, then you should be able to prevent most attacks.
However, it is better to disable PHP file execution on the wp-content/uploads path altogether.
If a malicious PHP file is uploaded to this directory, it could be catastrophic.
To disable PHP file execution in the wp-content/uploads directory, simply go to Wordfence > All Options, look for the General Wordfence Options section, and make sure the Disable Code Execution for Uploads directory option is checked.

Step #10 – Disable File Editing
By default, WordPress allows all users with administrative privileges to edit theme files and plugins file codes directly from the WordPress dashboard.
This is a potential security risk.
Any hacker who gains access to your WordPress backend can add and run malicious code to access your server.
It is good security practice to disable all frontend code editing and stick to SFTP for file editing.
How to Disable File Editing in WordPress
Using SFTP or Cpanel File Manager, look for the wp-config file on the root of your WordPress installation (where you can find wp-content and wp-admin).
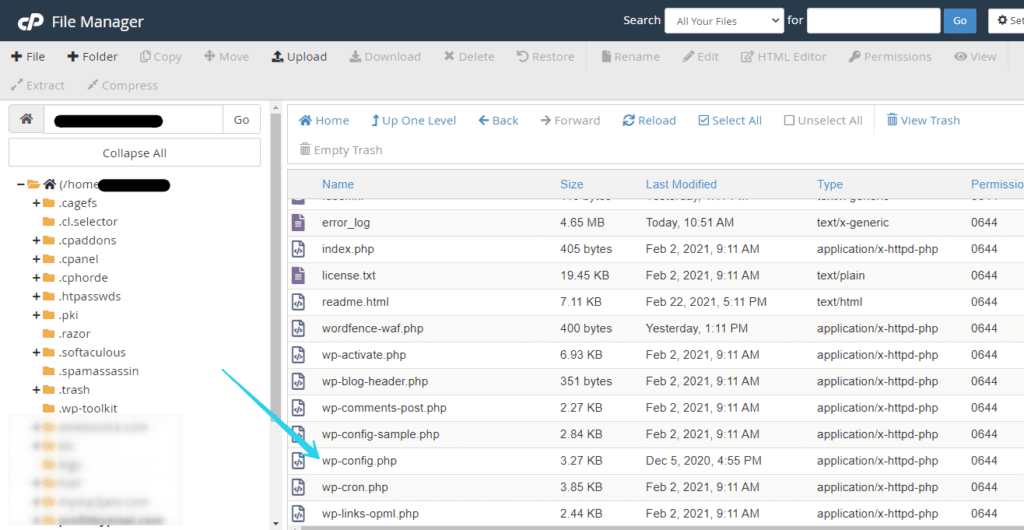
Next, open the wp-config file, and look for define('DISALLOW_FILE_EDIT', false);
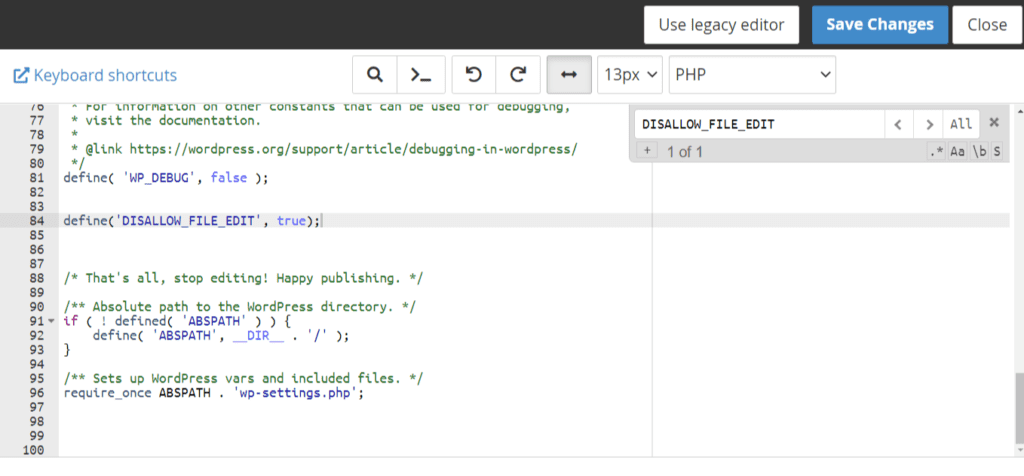
All you have to do is set it to true.
However, If you don’t find this line of code, just add the following line into your file:
define('DISALLOW_FILE_EDIT', true);You’ll need to add it right before the line: /* That's all, stop editing! Happy blogging. */
Once you’ve completed this, just click on save changes, and it should take effect.
Step #11 – Change the default WordPress database prefix.
When installing WordPress, it is good security practice to change the default database prefix.
Hackers always try all default values before proceeding to brute force methods.
Leaving the Database prefix as default will only make it easier for hackers to hack into your WordPress database.
This is a security measure you should do when you’re installing WordPress.
If you have an existing site with the default prefix, you can skip this as it requires quite a bit of technical skill (SQL) to change when WordPress has already been installed.
But, if you are up for the adventure, you can refer to the tutorial below:
Step #12 – Whitelist IP
With all the security measures being implemented, including username enumeration blocking and other login limits, it’s easy to get yourself locked out of your site (IP blocking) if you’re not careful.
With Wordfence, you can whitelist any IP address so that you or your staff will not get locked out if somehow you use the wrong username when login.
Here’s a simple guide you can follow to achieve IP whitelisting.
- Navigate Firewall subtab and Select All Firewall Options.
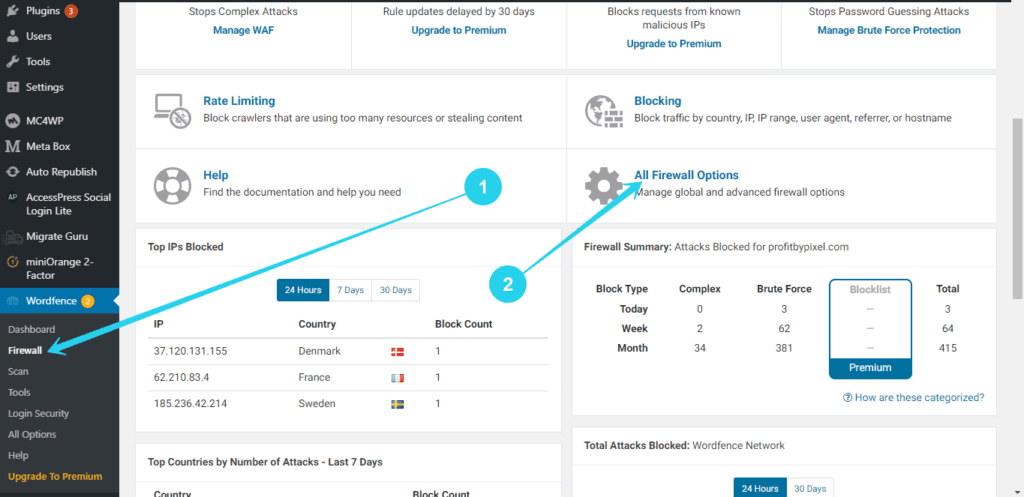
The Whitelisting feature is located in the Firewall section of Wordfence.
- On the next page, scroll down till you find Advanced Firewall options
- Then click on the little arrow at the right-hand side of the tab. You should see a text field where you can add IP addresses (separated by comma) to be whitelisted.

Once you’re done adding the IP addresses, click on Save Changes for the changes to take effect.
Conclusion
We have explored a 12-steps checklist that can protect your WordPress website from hackers.
Applying these measures should be enough to protect you from intruders and keep your website safe.
However, for the best results and higher security, it is always better to implement multiple preventive measures with an integrated layer of defense.
In the next lesson, we’ll go over how to set up a Disaster Recovery Plan to keep your website safe when all else fails.
